6-mile Hex Map
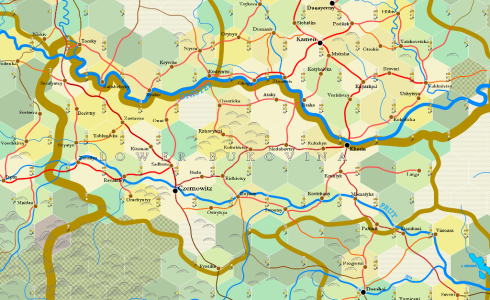
6-mile hex maps are zoomed-in maps derived from 20-mile hex maps, using a complex procedure of map drawing and random generation deriving from a map's infrastructure and real-world topography and place names.
Contents
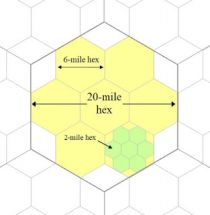
The designation "6-mile" is an inaccurate description. 6-mile hexes are derived from splitting a 20-mile hex, as shown in the image below, and are in fact 6.67 mi. in diameter, not six. Nonetheless, the "6-mile" appellation is used as a simplification.
Generation Procedure
Once the infrastructure of a given 20-mile hex has been determined, and all of its surrounding hexes as well, it's possible to create a rectangular "section" of 6-mile hexes.
This section includes two 20-mile hexes. Each 20-mile hex, everywhere in the world, is designated according to the latitude and longitude it represents. This enables us to locate that section on GoogleEarth.
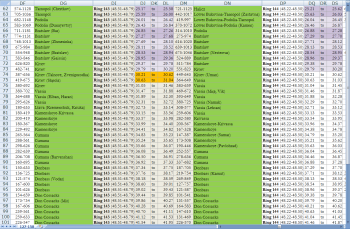
The image on the right provides a cacophony of numbers that we use to identify which hex falls into which set of coordinates. These are organised by "rings," the number of hexes this particular line of hexes is from the North Pole (ring 1). In the image shown, "ring 143" indicates the North Pole is 142 x 20 miles away. The latitude of ring 143 is between 48.51 N and 48.79 N. The left-hand hex, containing the settlement of Uman in Kiyev, has a longitude between 30.21 E and 30.62 E. The right-hand hex, in Vassia, has a longitude between 30.63 E and 31.04 E.
These coordinates are in decimal format, while GoogleEarth comprehends coordinates in degrees, minutes and seconds. So these numbers have to be translated - and, to save time, put into a format that can be copied and pasted into the GoogleEarth search window.
Thus we draw out the four corners of both orange-coloured hexes on the table below, showing the excel formulas we'll use and a final column for "pastable" answer. This last can be copied and pasted into the GoogleEarth search window and it will take us right to the correct spot. For anyone familiar with GoogleEarth, it's fascinating to watch the program zoom into the data once it's entered, bringing us close up to a group of trees, a mountain, a little village or a field:
| Description | Degrees | Minutes | Direction | Seconds | Four Points | Pastable |
|---|---|---|---|---|---|---|
| low latitude | 48 | 51 | N | =C2*0.6 | =$B$2&" "&$E$2&"'"&$D$2&", "&$B$4&" "&$E$4&"'"&$D$4 | 48 30.6'N, 30 12.6'E |
| high latitude | 48 | 79 | N | =C3*0.6 | =$B$3&" "&$E$3&"'"&$D$3&", "&$B$4&" "&$E$4&"'"&$D$4 | 48 47.4'N, 30 12.6'E |
| low longitude | 30 | 21 | E | =C4*0.6 | =$B$2&" "&$E$2&"'"&$D$2&", "&$B$5&" "&$E$5&"'"&$D$5 | 48 30.6'N, 31 2.4'E |
| Bournemouth | 31 | 4 | E | =C5*0.6 | =$B$3&" "&$E$3&"'"&$D$3&", "&$B$5&" "&$E$5&"'"&$D$5 | 48 47.4'N, 31 2.4'E |
Plotting the Section
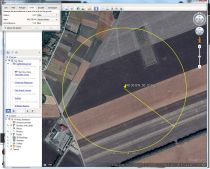
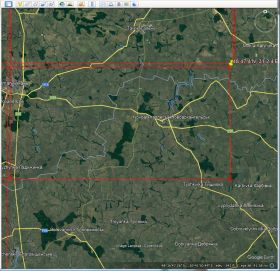
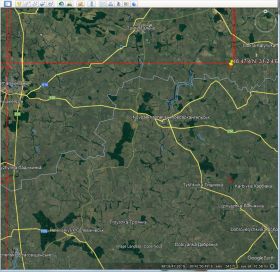
Following the first search, we find ourselves in a field on the edge of a small Ukraine village. We go up to the tool bar and select a "circle" tool and we draw a circle around the section corner point. We plug in each plot point next, making circles as we go, laying out the connect-the-dots set up for drawing a rectangle.
Using the small red circles, we use the "path" tool next to the circle tool and connect the dots, creating our rectangle section. This corresponds with the two 20-mile hexes to be expanded.
This section of GoogleEarth gets used for a number of things, so it needs to be saved. On the side toolbar of GoogleEarth, there's a heading called "Temporary Places." The new "Path Measure" we created can be saved by right clicking it. Once it jumps to the "My Places" heading, the four circle measures can be deleted. They've done their job. This part of the process can be left for a moment while we move onto getting the 6-mile map ready.
Starting the 6-mile Map
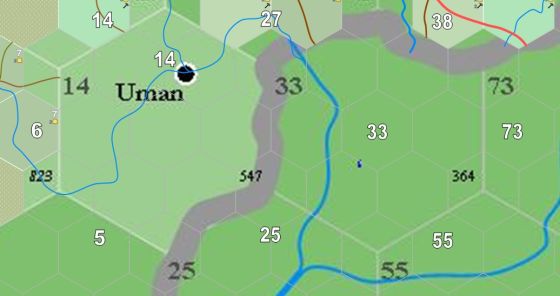
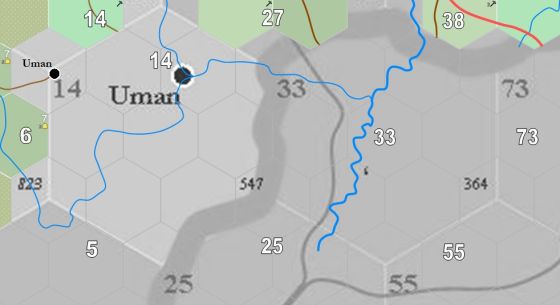
As can be seen, the 6-mile hexes can be seen overlaid atop the 20-mile hexes beneath, one with the settlement of Uman and one without. To the west and north are 6-mile hexes that have been created. Large white numbers indicate the infrastructure for each 20-mile hex. These numbers are important for indicating the direction of roads into and out of the section we're mapping.
Our first steps will be to provide basic information for these two hexes based on GoogleEarth's information. Take note of the blue rivers that have already been added to the map. These are guesses ... including the thicker blue river that is part of the 20-mile map underneath. We'll want to correct those river courses.
We also want to get a more accurate location for Uman. Occasionally the initial plotting is significantly incorrect. In addition, a series of brown dirt roads are also shown, cut-off at the edge of those hexes that are undone. The location of these roads is also a guess. We don't know yet, except for Uman, what villages or towns might be here, not until we generate that information. For now, however, our first step is to address the section's topography.
Topography
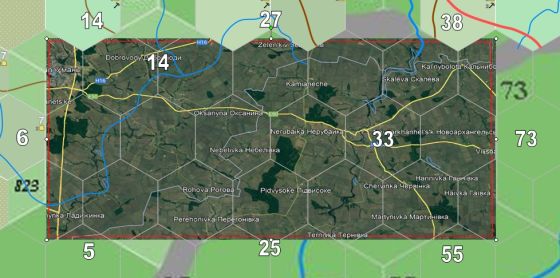
To do that, we take a screen shot from GoogleEarth, of the part we've plotted; we paste that in paint, and cut out the visual rectangle that we need. That rectangle is then pasted into the 6-mile map above and placed as indicated, underneath the 6-mile hexes and cutting off the bottom and top tips of each hex. You can see that we're covering the tips of other hexes, above and below, as we do this. Some stretching of the GoogleEarth image does occur.
Now we can correct for the narrow river on the left hand side and plot the bigger river on the right. Uman moves off into the corner of the map, with the name cut off (check it on GoogleEarth). In drawing the rivers there's no need to be absurdly precise. In the same way, we don't need to attempt to add every possible river. The goal isn't to produce an exact simulation of the Earth — if that were the case, we'd toss all this mapmaking and just run our game from GoogleEarth. No, what we want is to personalise our world, and create a map that we can pile notes on, if the players ever come this way.
We want to look for any lakes, and we want to check GoogleEarth itself for elevations by using the program's three-dimensional resolution. There's a very tiny lake on the right, but it's only 1.7 miles long (we can measure it with the path tool) and just 0.17 miles wide. Too small for us to deal with. As far as the possibility of hills, there are a few rolling places but nothing with an elevation change of more than 100-150 ft. Too small to add a hill symbol to the map.
With this done, we can get rid of the GoogleEarth reference, and recolor the background in grey tones. This makes it easier for us to see. Note the shift of Uman to the west.
Hex Types
Here is where we incorporate the infrastructure. Infrastructure is an indication of how developed, or how civilised, a given hex is. Each hex is assigned a "type," between 1 and 8. The lower the number, the more developed it is. Type-1 hexes are very developed, containing no less than a commercial town and quite probably a big settlement. Type-8 hexes are completely undeveloped, with no recognised permanent residents living inside the hex. Our goal is to define each 6-mile hex according to it's type, so we can determine how many people live there, what sort of facilities it has, how much food it grows and what sort of social characteristics it has.
The left-hand side has 14 infrastructure, while the right has 33. Neither of these are very high. 100 infrastructure is a good strong number; 400 infrastructure indicates a highly developed part of the world. The right side of our section, that in Vassia, much more developed than the left, despite the presence of Uman. Uman is actually a very small village with only 213 people, founded in 1616 (only 34 years before the game world takes place).
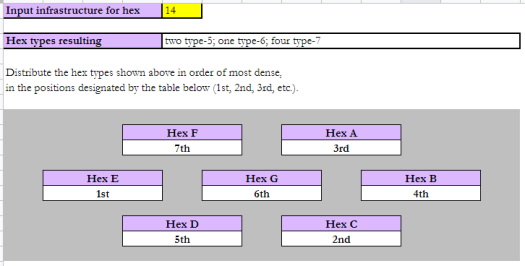
These 14 points are distributed throughout the 20-mile hexes seven 6-mile hexes. These seven hexes are called a "hex group." Note that Ulan is in none of these. To save time, I've built an excel program that generates the distribution automatically, which the reader can use. By putting 14 in the yellow box, I can generate which hex type occurs in which part of the hex group, as shown.
The image indicates that there are two type-5 hexes; one type-6; and one type-7. Putting these in order, the type-5 hexes go in the 1st and the 2nd positions — far left and bottom right. The type-6 goes in the 3rd position, top right. The remaining hexes are all type-7.
There are various small symbols that are used to designate the hex, once we know its type. On the right is a symbol for a typical type-7 hex.
